
Managing Account Names
Your virtual mailbox at US Global Mail can receive mail for multiple names/recipients in the same mailbox.
ADDING ACCOUNT NAMES
To add a new name, Log in to your US Global Mail account.
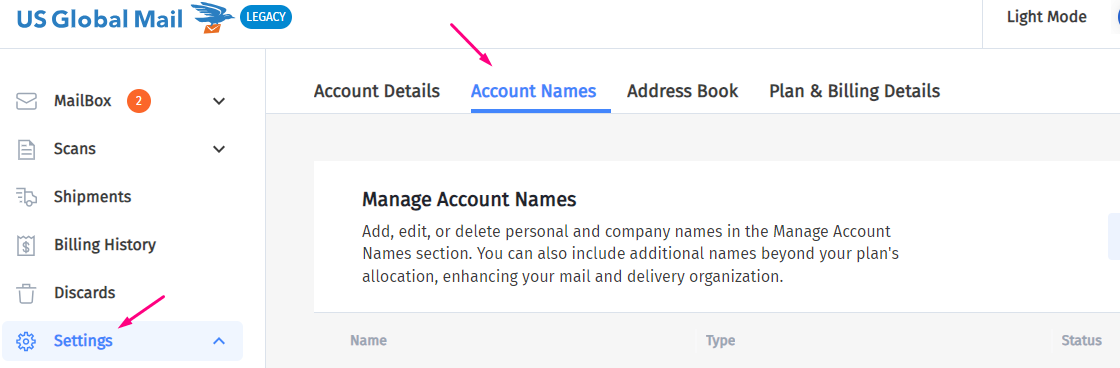
Go to “SETTINGS”.
Under Account Settings, click on “Account Names”.
Click “Add New Account Name” if you’re adding a new name, or select an existing name.
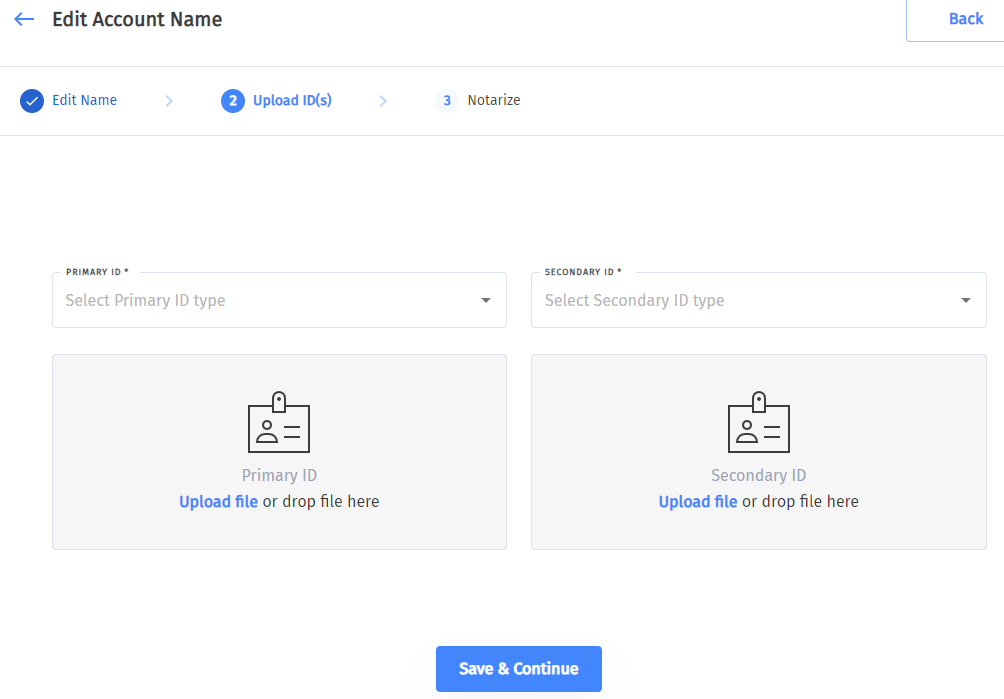
Click “Upload ID” or look for the option to add/update ID.
Choose the type of ID you’re uploading.
Upload the file for your primary ID.
Scroll down to upload your secondary ID.
Click “Save and Continue”
Remember, you need to upload two forms of ID for each name on the account (except for business names). This is required per USPS regulations and helps us verify your identity and keep your mail secure.
Adding alternative names for one person
- You can add different names of yours (ex: maiden names) in all plans).
- You’ll need to show us IDs of these names (even if the IDs are no longer valid).
- Contact us to add your alternative names to the account.
Adding names of a deceased family member
No IDs are required for deceased names.
Adding a company name
No documentation is needed to add a company name on your mailbox. However, please note there must be 1 individual account name – primary account holder- on the account before a Company can be added to the account.